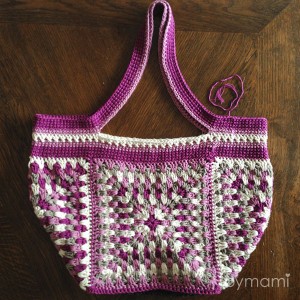
Crafternoontreats has a fabulous Bagalong with big chunky granny squares. A lovely practical bag big enough to fit a bunch of yarn or all you need for a day at the beach. Sizing is all up to you! I was inspired by a talented IG friend, Hege. When i saw her beautiful retro squares become a bag, I knew I had to make one too! I didn’t follow the Bagalong, but improvised for a likewise adequate result.The squares I made are crocheted in a special way to make the texture tight with no gaps. This way, the bag doesn’t necessarily need any padding.
DIY
I used just about 550g (11 skeins) Drops <3 You No.5, in colorways Purple, Heather, Off white and Beige, and Dark grey for the bottom.
Square
All rounds begin with a ch3 (counts as a dc).
- 12 dc in a magic ring
-
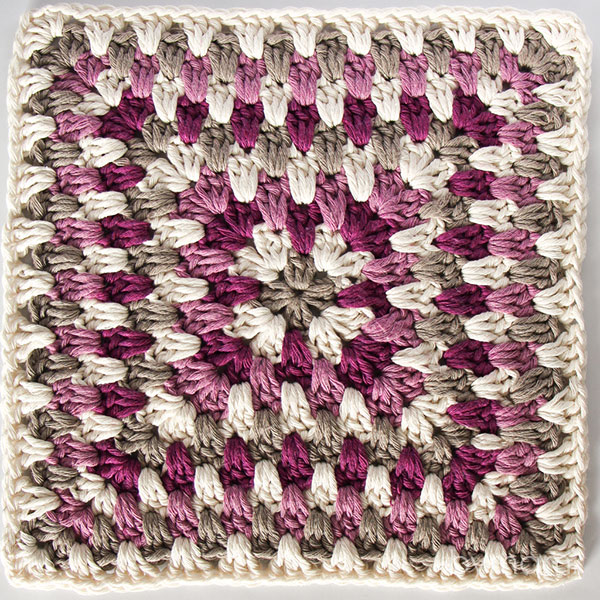
[3 dc, ch1, 3 dc] (corner made) between two dc’s, skip 3 (this is a group of dc’s). Repeat 3x. Making a regular granny square, you would normally do the stitches in the space between groups of dc’s, this one is slightly different to prevent any gaps in the pattern.
- 3 dc to the top of the middle dc of group of dc’s from the previous round. [3 hdc, ch1, 3 hdc] in the corner. Repeat 3x.
- 3 dc to the top of the middle dc of group of dc’s from the previous round, repeat in next group of dc’s. [3 hdc, ch1, 3 hdc] in the corner. Repeat 3x.
- –11. Continue with 3 dc to the top of the middle dc of every group of dc’s from the previous round and put [3 hdc, ch1, 3 hdc] in every corner.
Make 5 squares. I made one of them all dark grey, as the bag does get dirty when put down.
Assembly
Take your bottom square and one of the side squares and put them Wrong sides together, with the stitches aligned. Put 2 sc in the corner through both squares. Put 1 sc in every stitch through both squares, and two sc in the corner. Without cutting yarn, place the next square wrong sides together with the bottom square. Be careful not to crochet into the already attached side. Attach the square just like the first one. Repeat with the last two squares. Do not cut yarn. Turn work, and hold the first and last attached sides together, this time with right sides facing. Crochet the sides together as before. Cut yarn once you reach the top, and continue with the remaining sides. Remember to put right sides together. When the last two sides are joined, do not cut yarn, but carry on crocheting along the top edge of the bag, 2 sc in the corner, 32 sc, 2 sc in the corner. Repeat 3x.
Edge
- –5. 1 sc in every stitch (144)
- Work a round of crossed dc’s.
Straps
- Move the beginning stitch 6 stitches counter crocheting direction and work 4 sc. Chain 80 (strap), skip the next 32 st and work 40. Chain 80, skip 32 st, 36 sc.
- –6. 1 sc in every stitch (304)
Fasten all ends. If you want to, you can do a padding if you want the bag to be completely tight or leave it as it is.
Happy hooking!