


 These spring coloured Darlings were simply waiting for me to go shopping the other day and into the basket they went, with the intention of using it for a chunky girlie rug for my Babygirl to play on. Usually Google is my best friend when I need to find inspiration and/or a pattern. Only this time I didn’t – but then I just have to make up my own, right?!
The flimsy idea i had when i saw the yarn in the shop, was something mandala-like totally oversized! With lots and lots of happy coloured stripes and different textures and patterns. Mostly I just jump right in, this time being no exception.
I’m really happy about the result – and I want to share it with you!
As both quality and the thickness of the t-shirt yarn influent on the result, this pattern is only indicative! If your rug starts rolling or bending up around the edge, add some stitches, if it starts to ruffle you have too many and will have to hold back on the amount of stitches, do a round without adding stitches or redo the whole round with fewer stitches (do not start to decrease, it’s better to just do a round without adding stitches).
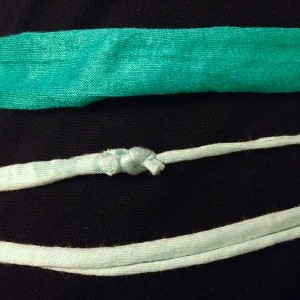
Buying t-shirt yarn is like playing the lottery, either you win or you lose! My purchase unfortunately had widely different thickness and was full of knots. I counted 7 knots in a single round half way through the rug. It can be quite a challenge, if you want the end result to look nice and even. I hid all the knots on the back or inside the stitches.
TIP: If the yarn abruptly changes from thick to thin, consider crocheting two stitches together!
Most t-shirt yarn is reasonably cooperative because of its elasticity (some more than other) and will pull in place if you dont crochet to tightly.

Spring Princess Rug
Important: The directions are only indicative. Each step is a section that will be repeated throughout the round. All rounds begin with a ch1, ch2 or ch3, depending on the starting stitch ( ch1 for a sc, ch2 for a hdc, ch3 for a dc), and the chain counts as the first stitch. All rounds are closed with a sl st to the chain 1, 2 or 3. Diameter of the rug is approximately 80 cm, made on a 12mm hook.
This is how it’s done (US terms):
- In a magic ring put 12 dc.
- Sc, ch 1 in each st.
- 3 dc together in each ch1, ch 2.
- 5 dc around ch2.
- Sc in each st.
- V-stitch (dc, ch1, dc), skip next st.
- 3 dc in ch of v-st, ch 1.
- 3 dc in each ch.
- Sc in each dc, fpdc around middle dc from rnd 7.
- Hdc in each st.
- Dc in each st.
- Sc, ch 1, sk next st.
- 3 dc in every ch, ch 1.
- 3 dc in ch between dc’s.
- Dc to the middle dc of rnd 13, ch 2.
- Sc in dc, dc to 2. and 3. dc of rnd 14 (keep ch 2 in back).
- Sc to each st.
Have fun hooking and remember that I’m always happy to see what you made of it!


